Goobbue Crochet Pattern
I’ve just re-upped my sub to Final Fantasy 14 ! I’m finishing up Shadowbringers now and hopefully I’ll get done with Endwalker before Dawntrail gets released. I luckily got to do the Lady’s Day this year and got the cutest pink Goobbue mount! She’s got such an adorable flower crown! Now, Goobbue has been requested so much over the years and that may have been the push I needed to sit down and make a pattern. This Goobbue crochet pattern is based on the Goobbue minon. Now if only I could get a Goobbue outfit for my little Lalafell…
Please check out the companion pattern page that has MINIMAL pictures for your convenience.
Materials:
[4] Medium Weight Yarn. [I Love This Yarn] specifically.
- Light Purple [Orchid]
- Mossy Green [Light Sage]
4.5 mm Size G Crochet Hook
[2] 16mm black safety eyes.
Stuffing (fiberfill, polyfill, etc.)
Tapestry Needle
Pins (helpful for holding pieces in place)
Abbreviations:
[American English Terms]
slst – slip stitch
ch – chain stitch
sc – single crochet
dc – double crochet
hdc – half double crochet
tc – triple crochet
inc – increase (2 single crochet stitches in the same stitch)
dec – decrease (single crochet 2 stitches together)
f/o – fasten off
[ ] – repeat instructions between [ and ]
( ) – the total number of stitches for row
CC – change color
MC – Magic Circle (Please see special instructions)
BLO – back loops only
FLO – front loops only
Finished Size:
The finished size is about 8.5-9″ tall. Size varies based on yarn, crochet hook, and your tension.
Special Stitch Instructions:
If your row starts with CH then you’ll be working in regular rows unless otherwise indicated.
The use of a marker is very useful if you’re not used to working in continuous rounds. It’s also great if you have to stop midway.
About the Pattern:
This Goobbue crochet pattern MAY NOT be publicly distributed or sold in print or digital form. You MAY NOT reproduce this pattern on your site. Instead, link back to this pattern.
This pattern is an original pattern by Bobbi Wetzler, Satu Stitches (2024). Do not claim this pattern as your own. Goobbue and Final Fantasy are registered trademarks or trademarks of Square Enix Co., Ltd. I am not affiliated with Square Enix.
You can NOT sell dolls made from this pattern as the doll’s likeness is under the copyright of SquareEnix. This pattern is for personal use ONLY.
If you’d like an ad-free PDF download of this pattern, you can find it in my shop!
Body
With light purple yarn:
1. CH9 – 7sc, 3sc in same stitch, continue down other side of chain: 6sc, 1inc (18) Continue in rounds.
2. 1inc, 6sc, 1inc, 1sc, 1inc, 6sc, 1inc, 1sc (22)
3. 1sc, 1inc, 6sc, 1inc, 1sc, 1inc, 1sc, 1inc, 6sc, 1inc, 1sc, 1inc (28)
4. 1sc, 1inc, 8sc, 1inc, 4sc, 1inc, 8sc, 1inc, 3sc (32)
5. 1inc, 1sc, 1inc, 8sc, 1inc, 1sc, 1inc, 2sc, 1inc, 1sc, 1inc, 8sc, 1inc, 1sc, 1inc, 2sc (40)
6. 2sc, 1inc, 12sc, 1inc, 6sc, 1inc, 12sc, 1inc, 4sc (44)
7. 1sc, 1inc, 2sc, 1inc, 10sc, 1inc, 2sc, 1inc, 4sc, 1inc, 2sc, 1inc, 10sc, 1inc, 2sc, 1inc, 3sc (52)
8-13. 52sc
14. 1inc, 4sc, 1inc, 15sc, 1inc, 4sc, 1inc, 4sc, 1inc, 15sc, 1inc, 4sc (58)
15. 2sc, 1inc, 3sc, 1inc, 17sc, 1inc, 3sc, 1inc, 2sc, 1inc, 3sc, 1inc, 17sc, 1inc, 3sc, 1inc (66)
16-17. 66sc
18. 60sc – skip 15stitches, 1sc in the 16th stitch. This is the new row start. Move your marker.
19. 4sc, 1inc, (5sc, 1inc) x 2 – skip 15 stitches, 1sc in the 16th stitch, 4sc, 1inc, (5sc, 1inc) x 2, 1sc (42)
Stuff as you go.
20. (6sc, 1inc) x 6 (48)
21-34. 48sc
35. 17sc – skip 16stitches, 1sc in the 17th stitch, 7sc – skip 16 stitches, 1sc in the 17th stitch.
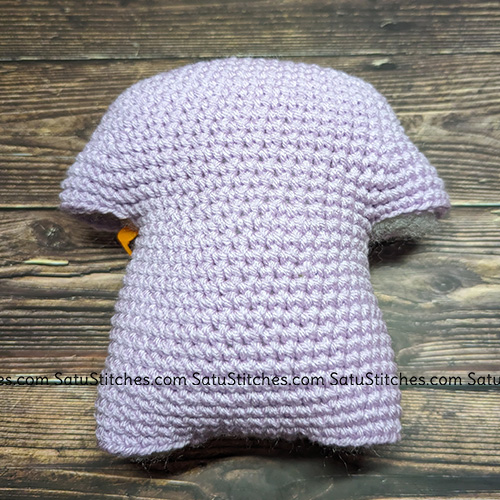
f/o with a long tail. Finish stuff your piece. Sew up the middle gap.

Mouth / Head
Top:
With light purple yarn:
Start with a long tail to help with sewing.
1. CH6 — 1inc, 3sc, 1inc (7)
2. 1inc, 5sc, 1inc (9)
3. 1inc, 7sc, 1inc (11)
4. 1inc, 9sc, 1inc (13)
5. 1inc, 11sc, 1inc (15)
6. 1inc, 13sc, 1inc (17)
7. 1inc, 15sc, 1inc (19)
8-11. 19sc
12. FLO: 3sc, 2hdc, 3dc, 3tc, 3dc, 2hdc, 3sc (19)
13. 19sc
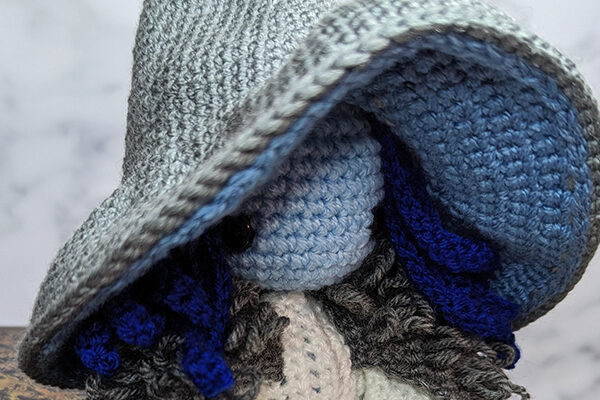
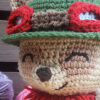
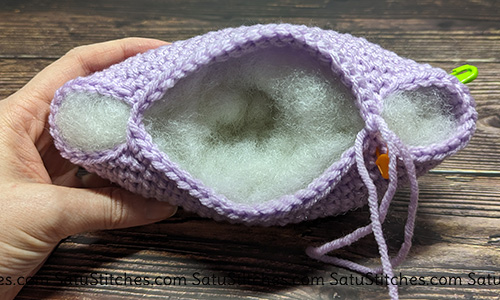
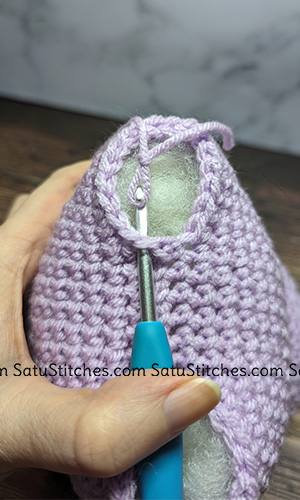
f/o with a long tail to help with sewing. Row 1 of this piece is attached 5 rows down from body row 1. Row 13 is attached 5 rows up from row 18 (where the arm gap begins.) You want the backloops from row 12 facing out. Stuff as you attach. 16mm eyes are placed between rows 8 and 9; 5 stitches from the sides and with 6 stitches viewable in between.
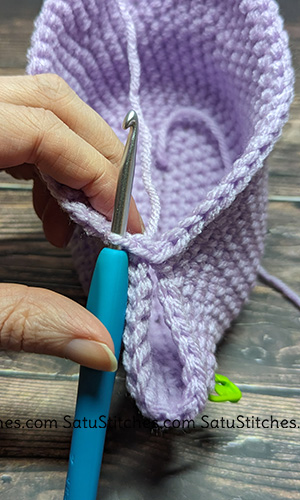
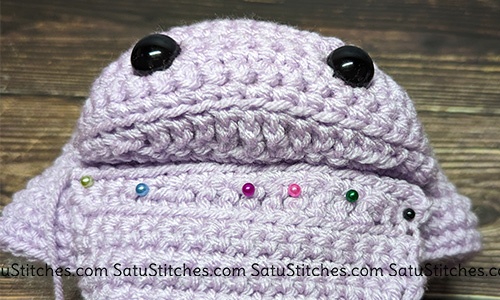
An easy way to attach is to first lay the piece completely flat as best in the middle of the body as you can.
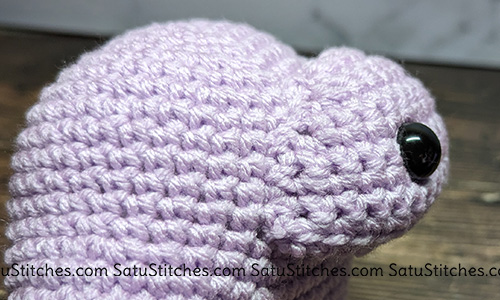
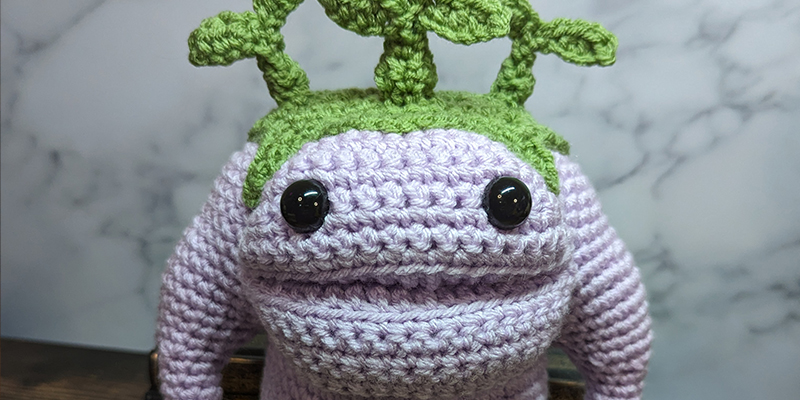
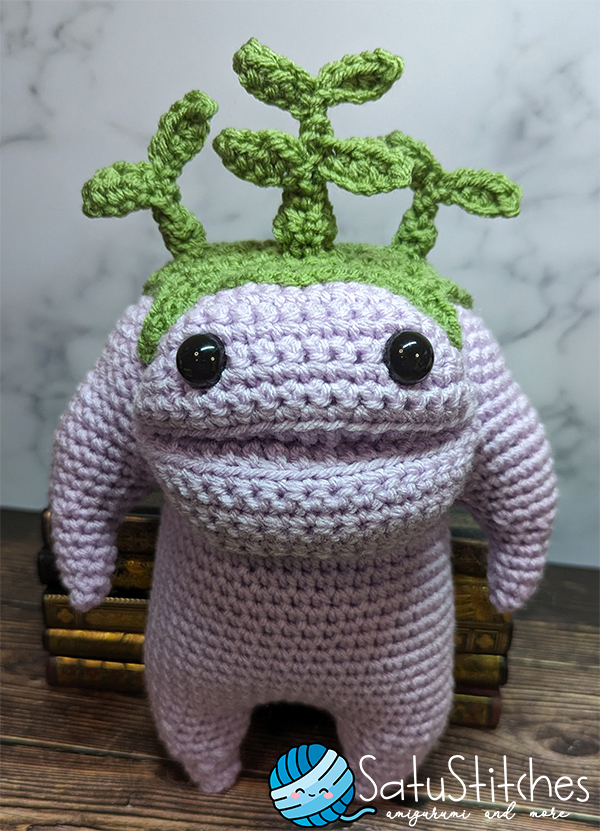
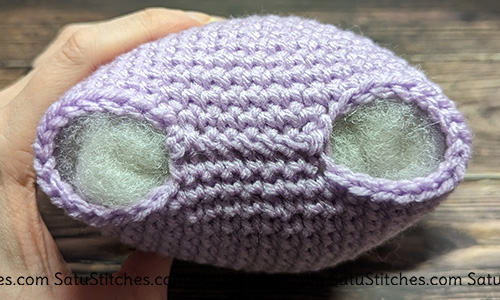
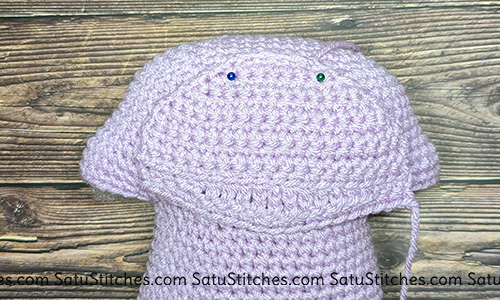
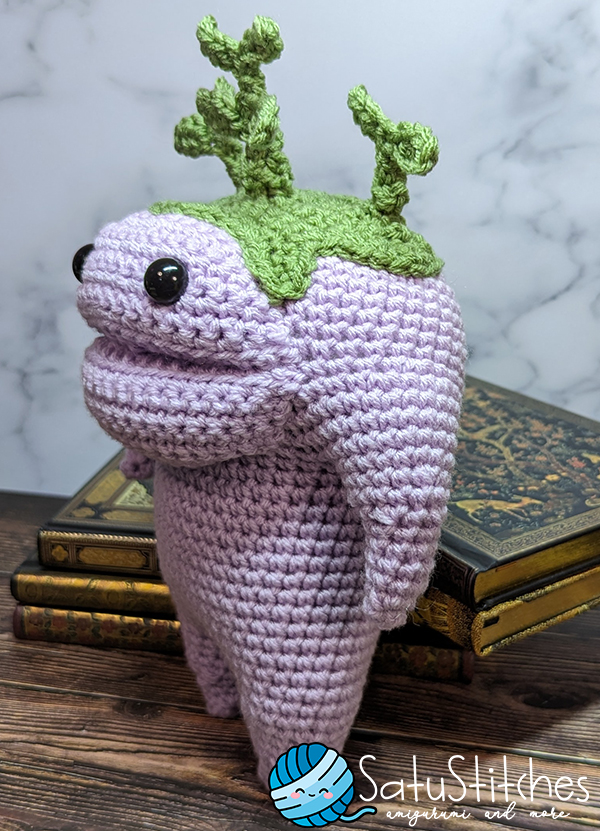
This is what it’ll look like when finished.
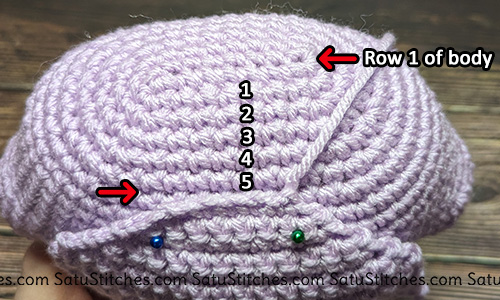
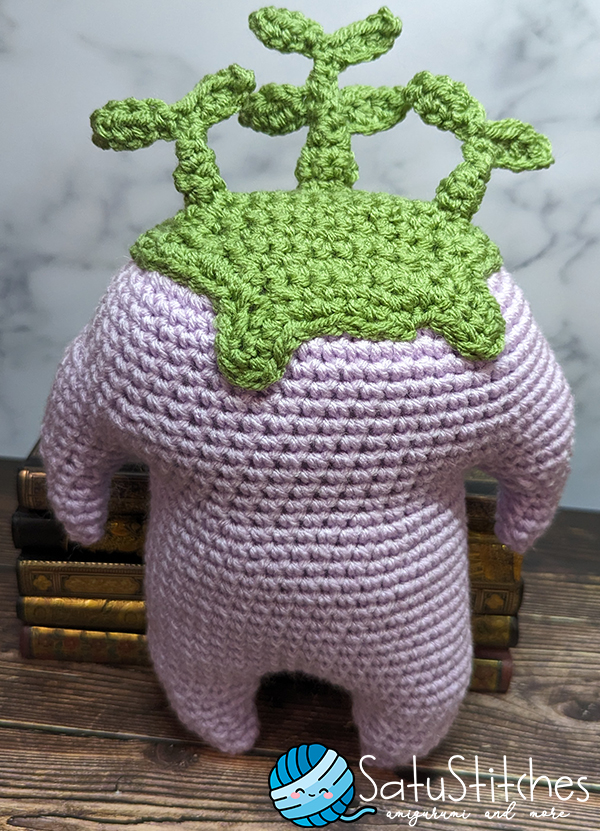
You can see here where to attach the top of the piece.
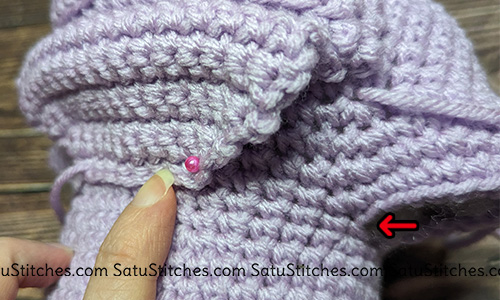
(Click to enlarge)
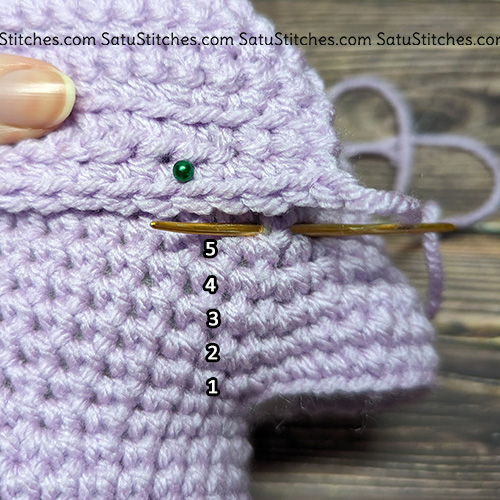
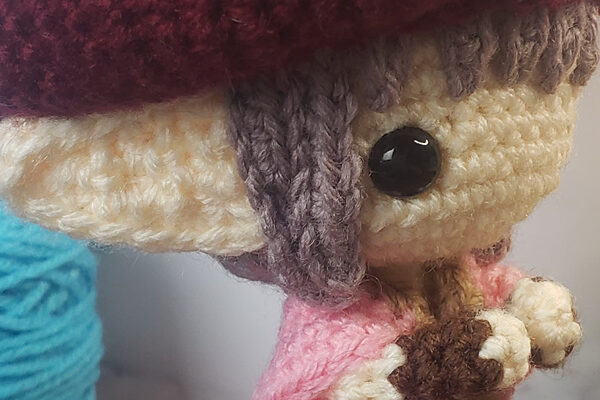
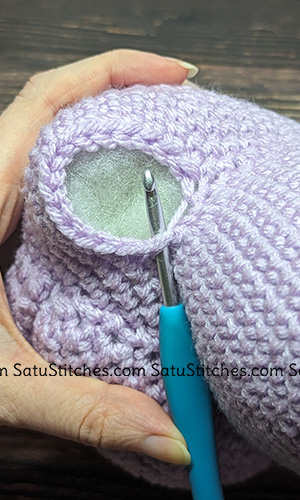
You can see here where to attach the bottom of the piece.
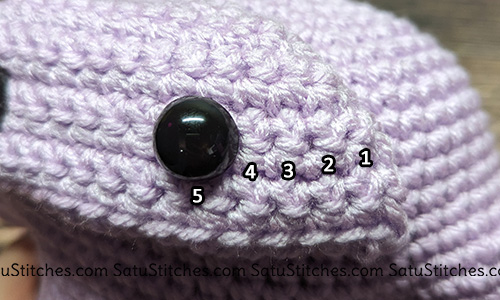
Eyes are attached between rows 8 and 9, 5 stitches from the side.
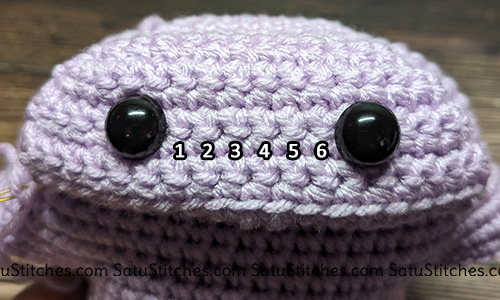
6 stitches will be visible in between the eyes.
Mouth / Head (cont):
Bottom:
With light purple yarn:
Start with a long tail to make sewing easier:
1. CH10 — 1inc, 7sc, 1inc (11)
2. 1inc, 9sc, 1inc (13)
3. 1inc, 11sc, 1inc (15)
4. 1inc, 13sc, 1inc (17)
5. 1inc, 15sc, 1inc (19)
6-9. 17sc
10. FLO: 3sc, 2hdc, 3dc, 3tc, 3dc, 2hdc, 3sc (19)
11. 19sc
f/o, leave a long tail to help with sewing. Row 11 is attached directly underneath of the top mouth piece. Row 1 is attached to row 18 of the body (where the arm gap begins. Stuff as you attach the sides.
Legs:
With light purple yarn
Pick up stitches starting from the inside of the leg.
1. CH2(counts as a stitch) — 19sc (20)
2. (3sc, 1dec) x 4 (16)
3-4. 16sc
Stuff as you go.
5. (2sc, 1dec) x 4 (12)
6. (1sc, 1dec) x 4 (8)
7-8. 8sc
9. 4dec (4)
f/o. Finish stuffing and close remaining gap.
Arms:
With light purple yarn
Pick up stitches starting from the inside of the arm.
1. CH2(counts as a stitch)– 17sc (18)
2. 1dec, 6sc, 1dec, 6sc, 1dec (15)
3. 2sc, 1dec, 7sc, 1dec, 2sc (13)
Stuff as you go.
4. 1dec, 2sc, 1dec, 1sc, 1dec, 2sc, 1dec (9)
5-8. 9sc
9. (1sc, 1dec) x 3 (6)
10. 3dec (3)
f/o. Finish stuffing and close gap.
Leg start.
Arm start.
Moss:
With mossy green yarn:
Start with a long tail to help with sewing.
1. CH5 — 4sc (4)
2. 1inc, 2sc, 1inc (6)
3. 5sc, 1inc, CH6 (7)
4. 11sc, 1inc, CH5 (13)
5. 14sc
6. 1inc, 9sc, 1inc (13)
7. 12sc, 1inc (14)
8. 1inc, 12sc, 1inc (16)
9. 1inc, 14sc, 1inc (18)
10. 1inc, 16sc, 1inc (20)
11. 1sc, 1dec, 14sc, 1dec, 1sc (18)
12. 2sc, 1dec, 10sc, 1dec, 2sc (16)
13. 1dec, 12sc, 1dec (14)
14. 1dec, 10sc, 1dec, CH5 (12)
15. 4sc, 1dec, 8sc, 1dec (14)
16. 1dec, 7sc, 1dec (9)
17. 1dec, 5sc, 1dec, CH5 (7)
18. 4sc, 1dec, 3sc, 1dec (9)
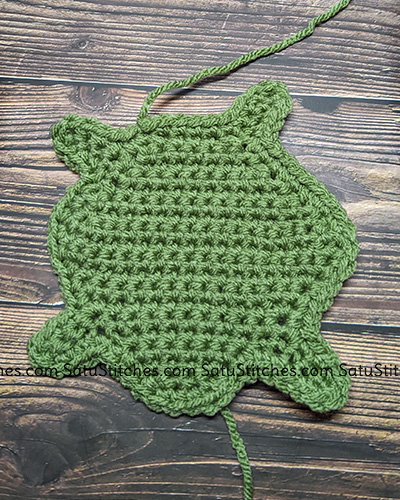
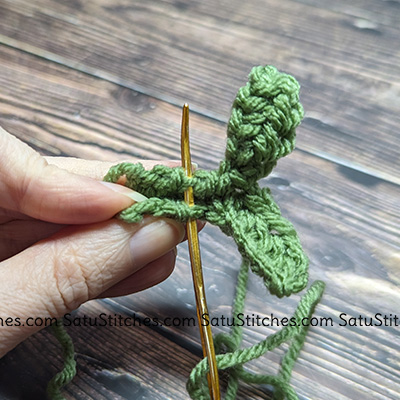
Starting from this point, create a single crochet border around the entire piece.
f/o and attach to head. Row 1 is the front.
Leaves:
(Make 2)
With mossy green yarn:
1. CH5 — 4sc (4)
2. 2dec (2)
3. 2sc
4. 1dec, CH5 (1)
5. 1sc, 2hdc, 2sc, CH5 (5)
6. 1sc, 2hdc, 1sc, 1slst (5)
f/o, leave a long tail for sewing. Sew rows 1-4 together to create the stem base. The leaves are rows 5 and 6. I like to attach the big one first, then attach the little ones on the side second.
Large Leaf:
With mossy green yarn:
1. CH7 — 6sc (6)
2. 6sc
3. 1dec, 2sc, 1dec (4)
4. 1sc, 1dec, 1sc, CH6 (8)
5. 1sc, 1hdc, 1dc, 1hdc, 4sc, CH6 (8)
6. 1sc, 1hdc, 1dc, 1hdc, 1sc, 2dec (7)
7. 1dec (1)
8. 1sc, CH5 (1)
9. 1sc, 2hdc, 2sc, CH5 (5)
10. 1sc, 2hdc, 1sc, 1slst (5)
f/o, leave a long tail for sewing. Sew rows 1-4 together and rows 7-8 together to create the base stem. The leaves are rows 5,6,9, and 10. Attach to body.
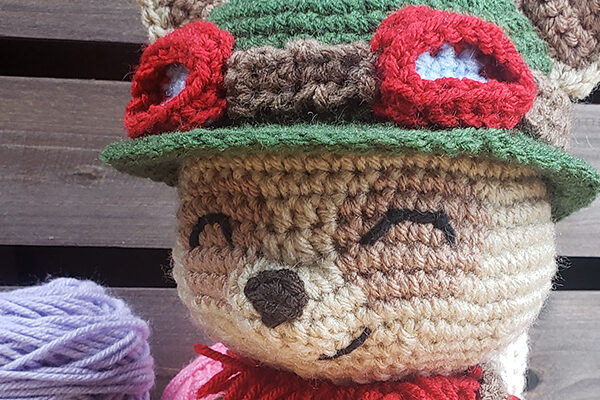
Fin <3
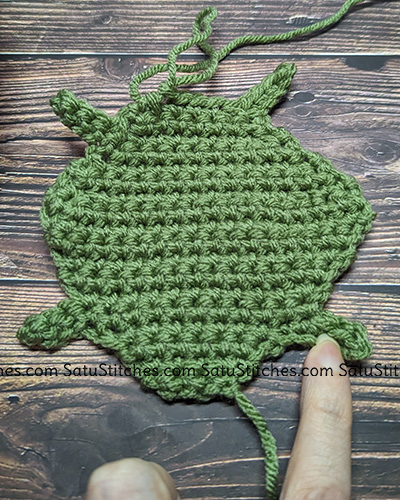
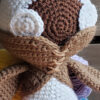
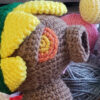
Before the SC border.
Thank you all so much for completing this Goobbue crochet pattern! I hope to see pictures of the Goobbue army you are obviously creating. Just don’t release them in Uldah… that might get awkward. I’m happy to see others love Goobbues as much as I do. So tell me, what monster from any MMO are you particularly nostalgic over?