Abbreviations
US: sl st
UK: ss
US: sl st
UK: ss
You’ve finished your piece and you may see a “f/o” in one of your patterns. They mean to finish off your piece… but how?! You can’t just clip the yarn, it’ll unravel! So I’ll show you the slip stitch, the shortest of all stitches. And then we’ll get some practice on weaving in the ends so they don’t show.
Slip stitches can be used for many things. A slip stitch can be used to finish off a piece, especially if it’s being worked in a round. It’s the smallest / shortest stitch and as such it’s rarely used by itself.
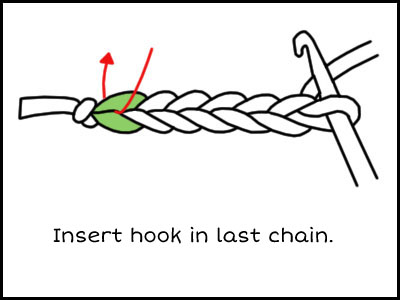
1. Create a foundation chain of 6 chain stitches.
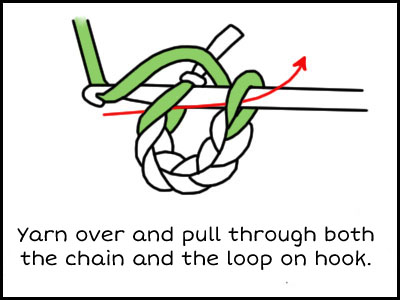
2. Insert your hook in the very last chain. Yarn over. Pull through the chain and the loop on your hook. Finished! You just made your very first slip stitch.
Continue going through each of the chain stitches on your newly created loop and keep making slip stitches to practice.
If there’s one thing I hate about crocheting pieces, especially ones with multiple colors, is weaving in ends. It’s certainly not because it’s hard or anything like that; it’s extremely easy. It’s just time-consuming. It’s a necessary evil.
Always work your end on the backside of the piece, so it will be less noticeable. After weaving in the tail, stretch your work a little to hide your ends even more, and cut off any extra that becomes visible.
This is hard to show in diagrams. I highly suggest watching the video!

Go through all the previous pieces you’ve made throughout this course and finish them off and weave in the ends.